
I’ve spent my last month learning Android, time to share.
soon after my first take on AIR for Android – and as I had already given Java a try while studying Processing – I thought starting an Android-only project wouldn’t be that hard.
actually the basics are pretty easy to catch ; I won’t go too much into details but just for people who know Flash and are absolute strangers to Android, here’s an overview.
OVERVIEW
an Activity is somewhat the equivalent of the Stage + an InteractiveDisplayObject. they handle the low level actions ( onCreate, onPause, onResume, onWindowAttached ( = +/- ADDED_TO_STAGE ) ). Activities can be linked through Intents that correspond roughly to Events or as I usually do in my projects NavigationEvent : Events that contains callback data about the state of the app.
the object we’ll use the most to display things and retrieve user interactions is a View, by default, there are already lots of them: View, Button, TextView, ImageView, SurfaceView, GLSurfaceView etc. each of which have various properties, the idea is that they are displayObjects.
the Views hold a Canvas object that corresponds to the Graphics in Flash, there are plenty of tools to draw driectly to the canvas ( lines, circles, arcs, rects, some kind of “drawTriangles” … ) and you can have a Path object that will handle more complex things.
there’s also a Paint object that is extremely powerful, it would be the equivalent of the LineStyle + beginFill + beginGradientFilll + ShaderFill methods and more.
as compared to Flash, everything is verbose and very loosely coupled, for instance:
View.setOnSystemUiVisibilityChangeListener( arg );
is precisely named and it’s easy to understand what it does yet it knowing it by heart is a pure time loss.
fortunately as I mentioned last time, eclipse is your friend and most the constants can be retrieved easily. as far as I am concerned, the most bothering part is the Type casting for numbers ; having to cast between double, float, int, short, long, byte is pretty boring + it will mess up the computations if you don’t pay attention.
that’s already lots of stuff to play with ; I’ve ported my Processing version of biga in a snap of a finger.
and here’s a sample View class that will draw the basic shapes:
public class ShapeTest extends View
{
	private Paint paint;

	private Arc a;
	private Circle c;
	private Edge e;
	private Rectangle r;
	private RegularPolygon p;
	private Triangle t;

	public ShapeTest( Context context )
	{
		super(context);
		init(context);
	}

	private void init(Context context)
	{

		//paint object required to draw
		paint = new Paint();
		paint.setStyle(Paint.Style.STROKE);
		paint.setStrokeWidth(2);
		paint.setAntiAlias(true);

		//arc
		a = new Arc(200, 200, 75, -Math.PI / 3, Math.PI / 2);
		a.sector = true;
		//circle
		c = new Circle(100, 100,50);
		//regular polygon
		p = new RegularPolygon(150, 350, 100, 6);
		//triangle
		t = new Triangle(c, a, p.points[4]);
		//rectangle
		r = new Rectangle(p.x, p.y, p.radius, p.inRadius);
		//edge
		e = new Edge(c, p);

	}

	@Override
	protected void onDraw(Canvas canvas)
	{
		//refresh the canvas
		canvas.drawColor(0x303030);

		//draws the shapes
		a.draw(canvas, rgbColor(0xCC0000));
		c.draw(canvas, rgbColor(0xFFCC00));
		e.draw(canvas, rgbColor(0xCC0066));
		r.draw(canvas, rgbColor(0x0033CC));
		t.draw(canvas, rgbColor(0x009933));

		//draws the regular polygon and the anchors
		p.draw(canvas, rgbColor(0x663366));
		p.drawAnchors(canvas, rgbColor(0xFFCC00), 5);

		//computes the triangle's circumcircle
		Circle cc = TriangleUtils.circumcircle(t);
		cc.draw(canvas, rgbColor(0x0033FF));

	}

	private Paint rgbColor(int RGB)
	{
		paint.setARGB(0xFF, (RGB >> 16 & 0xFF), (RGB >> 8 & 0xFF), (RGB & 0xFF));
		return paint;
	}

}
which should give you this wonderful result:
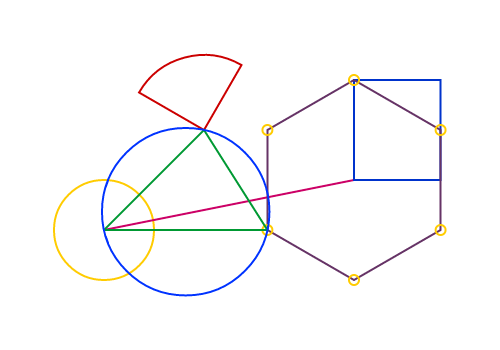
porting biga to Android means that all the methods described in the b.i.g.a. series can be seamlessly applied to Android (howdy!).
SENSORS
with Android, it’s possible (and easy) to access the hardware and start doing funny things that react to tangible inputs. that’s where mobile devices really rock: here’s the official doc explanation and here’s a doc that explains pretty well how things work. it also gives an indicative benchmark of how phones handle sensors (p.8).
to retrieve the available sensors’ list, you can use this snippet:
/**
 * returns the available sensors' list to String
 * @param activity the activity to perform the test on
 * @return a string of sensor id : name pairs
 */
static public String getAvailableSensorsList( Activity activity )
{
	String output = "";

	sensorManager = (SensorManager) activity.getSystemService(Context.SENSOR_SERVICE);

	for ( Sensor i: sensorManager.getSensorList( Sensor.TYPE_ALL ) )
	{
		output += ( i.getType() +" : "+ i.getName() +"\n"  );
	}

	return output;
}
NB most sensors work from API level 3 (Android 1.5) yet some sensors ( GRAVITY, LINEAR_ACCELERATION and ROATION_VECTOR ) can’t be handled under the level 9 ( Android 2.3.1 ).
NB² ( almost ? ) no android device can handle the GYROSCOPE where iDevices can, it’s a pity but with the level 9 API, the ROTATION_VECTOR returns the phones’ rotation formated as a Quaterion, I’ll hopefully address that in the next post.
APP HELPER
as I am a lazy bastard, I coined myself a utility class called AppHelper to perform the test above and some useful layout tasks like enabling the fullscreen mode, locking the orientation, enabling / disabling a sensor etc.
it’s not fully tested (far from it) and it needs Android 2.1 but it’s a good start.
and a typical use would go :
public class myActivity extends Activity
{

	@Override
	protected void onCreate(Bundle savedInstanceState)
	{

		super.onCreate(savedInstanceState);

		//enables the fullscreen mode
		AppHelper.fullScreen(this);

		//sets orientation to portrait
		AppHelper.orientation(this, Orientation.PORTRAIT);

		//retrieves the sensor list
		AppHelper.getAvailableSensorsList(this);

		//creates a view
		ShapeTest shapes = new ShapeTest( this );

		//second argument = layoutParams: FILL_PARENT
		addContentView( shapes, AppHelper.FILL );

		//binds the accelrometer (only) to shapes
		AppHelper.enableSensor( this, shapes, SensorType.ACCELEROMETER, SensorRate.NORMAL );

	}
}
and here you go for a fullscreen, portrait-oriented, fullsize, accelerometer enabled app :)
the class is here : AppHelper.java
SAVING PICTURES
another thing that bothered me a lot with Air (and I haven’t tried the solutions suggested in the comments of my last post, shame on me ) was not to be able to save files to disk. I found a couple of tutorials explaining how to do that.
an important thing is to specify in the manifest.xml that the app has the right to write data to the SD card.
this is done by adding the following permission to the manifest.xml of the app:
<uses-permission android:name="android.permission.WRITE_EXTERNAL_STORAGE"></uses-permission>
then a typical use would go :
//create a button
Button btn = new Button( this );
btn.setText( "save" );
//override the onClick behaviour
btn.setOnClickListener(new OnClickListener()
{
	@Override
	public void onClick(View v)
	{
		//save the view "shapes" to a "jpg" file called "image" with 80% quality
		FileSaver.saveCanvas( shapes, 80, "image", "jpg" );
	}
});
//adds the button 100% width / wrap the height
addContentView(btn, AppHelper.FILL_WRAP );
the class is called FileSaver, it’s available here: FileSaver.java. params for the format are “jpeg”, “jpg” or “png” (case insensitive).
NB the SD card is not available in debug mode so if you want to take a picture, you’ll have to unplug the device, wait for the card to be available again and then go. this really helped me take snapshots of my apps.
TIMING
As I couldn’t fully understand the events pipeline, a utility I really missed was a Timer class: Android doesn’t have a timeline which is quite normal but somewhat puzzling when coming from Flash. so I did a Timer that ticks every N milliseconds and updates a list of ITickers.
here’s how you can use it:
public class bigAndroid extends Activity
{
	@Override
	protected void onCreate(Bundle savedInstanceState)
	{

		super.onCreate(savedInstanceState);

		for ( int i = 0; i < 50; i++ )
		{
			//creates a view that implements ITcker ( see below )
			Ticker ticker = new Ticker( this,
										(int)( 50 + Math.random() * 380 ),
										(int)( 50 + Math.random() * 700 ),
										(int)( 0x808080 + Math.random() * 0x808080 ) );
			addContentView( ticker, AppHelper.FILL );

			//creates a timer with a random pace between 10- 510 milliseconds
			//+ assigns the ticker to it
			Timer timer = new Timer( (int)( 10 + Math.random() * 500 ), ticker );

			//starts the timer
			timer.start();
		}
	}

	private class Ticker extends View implements ITicker
	{
		private double angle = 0;
		private Paint paint = new Paint();
		private RegularPolygon hexa;
		public Ticker( Context context, int x, int y, int color )
		{
			super(context);

			hexa  = new RegularPolygon( x, y, 50, 6 );

			paint.setStyle(Paint.Style.STROKE );
			paint.setStrokeWidth( 4 );
			paint.setAntiAlias(true);
			rgbColor(color);
		}

		@Override
		public void tick()//that makes this class an ITicker :)
		{
			angle += Math.PI / 180;
			hexa.rotation(angle);
			invalidate();
		}

		@Override
		protected void onDraw(Canvas canvas)
		{
			hexa.draw(canvas, paint);
		}

		private void rgbColor(int RGB)
		{
			paint.setARGB(0xFF, (RGB >> 16 & 0xFF), (RGB >> 8 & 0xFF), (RGB & 0xFF));
		}
	}
}
you screen should be covered with colorful hexagons rotating at different speeds.
there are some handy methods too like:
//usual controls
timer.start();
timer.stop();
timer.pause();

//a way to change the pace
timer.setInterval( X );

//to add remove tickers
timer.addTicker(ticker);
timer.removeTicker(ticker);

//the current frame woohoo ! \o/
Timer.frame;

//an average fps over X frames, not sure it works fine
Timer.fps;
timer.setFpsComputationInterval( X );//the X in "X frames" :)
this class is available here: Timer.java
all of them are included in the biga.jar under utils/
I hope it can help someone :)
SAMPLES
so with these in hand, I could start playing around, first thing I did was a little arc menu: it’s like with the kinect, you have to remain still for a given amount of time and an arc is being drawn around your hand.

when the arc is full, I create a circle that slowly shrinks. we could trigger any action of course, it was more for the sake of doing it :)
here’s the code:
package net.nicoptere.android.arcpressure;

import java.util.ArrayList;

import utils.AppHelper;
import utils.AppHelper.Orientation;
import utils.ITicker;
import utils.Timer;
import android.app.Activity;
import android.content.Context;
import android.graphics.Canvas;
import android.graphics.Paint;
import android.graphics.PixelFormat;
import android.os.Bundle;
import android.view.MotionEvent;
import android.view.View;
import android.view.ViewGroup.LayoutParams;
import android.view.Window;
import biga.shapes2D.Arc;
import biga.shapes2D.Circle;
import biga.utils.Constants;
import biga.utils.GeomUtils;

public class Android_arc_pressureActivity extends Activity {

	private LongPressView press;


	@Override
	protected void onCreate(Bundle savedInstanceState)
	{

		super.onCreate(savedInstanceState);

		AppHelper.fullScreen(this);
		AppHelper.orientation(this, Orientation.PORTRAIT);

		setContentView( R.layout.main );

		LayoutParams full = new LayoutParams(LayoutParams.FILL_PARENT, LayoutParams.FILL_PARENT);
		press = new LongPressView(this);
		addContentView(press, full);

	}

	@Override
	public void onAttachedToWindow() {
		super.onAttachedToWindow();
		Window window = getWindow();
		window.setFormat(PixelFormat.RGBA_8888);
	}


	public class LongPressView extends View implements ITicker
	{

		private ArrayList<Circle> circles = new ArrayList<Circle>();

		private Paint paint;
		private int colorId;
		private int[] colors = new int[]
		{
				0xFFA556, 0xFFD2AA, 0xFFE8D4, 0xA9825F, 0x54412F, 0xBF9D80, 0xDDCAB9, 0xFFC656, 0xFFE2AA, 0xFFF0D4, 0xA9905F, 0x54482F, 0xBFAA80, 0xDDD1B9, 0xFF6D56, 0xFFB6AA, 0xFFDAD4, 0xA9695F, 0x54342F, 0xBF8880, 0xDDBEB9, 0x3A87AA, 0x7298AA, 0x8EA1AA, 0x3F6171, 0x1F3038, 0x557280, 0x7C8C94
		};

		private Arc arc;
		private long startTime;
		private long endTime;
		private long delay = 750;

		private float radius;
		private boolean started;

		public LongPressView( Context context )
		{
			super(context);
			init(context);
		}

		private void init(Context context)
		{

			setFocusable(true);

			paint = new Paint();
			paint.setStyle(Paint.Style.STROKE);
			paint.setStrokeWidth(5);
			paint.setAntiAlias(true);
			paint.setStrokeCap(Paint.Cap.ROUND);

			colorId = 0;

			arc = new Arc();
			arc.sector = true;

			Timer timer = new Timer(30, this);
			timer.start();

		}

		@Override
		protected void onDraw(Canvas canvas)
		{

			int id = 0;

			for( Circle c : circles )
			{
				if( c.radius > 0 )
				{
					rgbColor(colors[id % colors.length]);
					c.draw(canvas, paint);

					rgbColor(colors[( id + 1 ) % colors.length]);
					canvas.drawCircle(c.x, c.y, (float) (c.radius * Constants.oneByGoldenRatio), paint);

					c.radius-=.1;
				}
				id++;
			}

			if( started )
			{

				paint.setStyle(Paint.Style.FILL);

				arc.radius = radius;
				rgbColor(colors[ id % colors.length]);
				arc.draw(canvas, paint);

				arc.radius = (float) (radius * Constants.oneByGoldenRatio);
				rgbColor(colors[(id + 1) % colors.length]);
				arc.draw(canvas, paint);

			}

		}

		@Override
		public boolean onTouchEvent(MotionEvent event)
		{

			arc.x = event.getX();
			arc.y = event.getY();
			if( event.getAction() == MotionEvent.ACTION_DOWN ) startCountDown( event );
			if( event.getAction() == MotionEvent.ACTION_UP ) stopCountDown();
			return true;

		}

		private void startCountDown(MotionEvent event)
		{

			arc.startAngle = -Math.PI;
			arc.arcLength = 0;

			radius = (float) ( 60 + Math.random() * 100 );

			startTime = Timer.time();
			endTime = Timer.time() + delay;

			started = true;

		}

		private void stopCountDown()
		{

			arc.startAngle = -Math.PI / 2;
			arc.arcLength = 0;
			started = false;

		}

		@Override
		public void tick()
		{
			if( started )
			{
				double t = GeomUtils.map((double) Timer.time(), (double) startTime, (double) endTime, 0, 1);

				if( t > 1 )
				{
					colorId++;
					circles.add(new Circle(arc.x, arc.y, radius ) );
					stopCountDown();
				}

				arc.arcLength = t * Math.PI * 2;

			}

			invalidate();
		}

		private void rgbColor(int RGB)
		{
			paint.setARGB(0xFF, (RGB >> 16 & 0xFF), (RGB >> 8 & 0xFF), (RGB & 0xFF));
		}
	}

}
then I did a simple ball physics simulation using the accelerometer, a bit like the Ball Pool experiment by Mr Doob. the “physics” part being reduced to 20 lines (VS including Box2d like Mr Doob).
you press the screen and spawn some balls that react to the orientation of the device.
I’ve tried Box2d by the way. here is the port I used AndBox2D (good job), without surprise, it’s too slow to be used for real.
it looks like this:

Actually it’s more of a stress test :)
the code is based on a snippet wheel of trinkets by Jim Bumgardner.
here it goes:
package net.nicoptere.android.ballphysics;

import java.util.ArrayList;

import utils.AppHelper;
import utils.AppHelper.Orientation;
import utils.AppHelper.SensorRate;
import utils.AppHelper.SensorType;
import utils.ITicker;
import utils.Timer;
import android.app.Activity;
import android.content.Context;
import android.graphics.Canvas;
import android.graphics.Paint;
import android.graphics.PixelFormat;
import android.hardware.Sensor;
import android.hardware.SensorEvent;
import android.hardware.SensorEventListener;
import android.os.Bundle;
import android.view.MotionEvent;
import android.view.View;
import android.view.ViewGroup.LayoutParams;
import android.view.Window;
import biga.shapes2D.Circle;
import biga.utils.Constants;
import biga.utils.GeomUtils;

public class Android_ball_physicsActivity extends Activity {

	@Override
	protected void onCreate(Bundle savedInstanceState)
	{

		super.onCreate(savedInstanceState);

		AppHelper.fullScreen(this);
		AppHelper.orientation(this, Orientation.PORTRAIT);

		setContentView(R.layout.main);

		BallPhysics physics = new BallPhysics(this);
		LayoutParams full = new LayoutParams( LayoutParams.FILL_PARENT, LayoutParams.FILL_PARENT );
		addContentView( physics, full );

		AppHelper.enableSensor(this, physics, SensorType.ACCELEROMETER, SensorRate.GAME );

	}

	@Override
	public void onAttachedToWindow() {
		super.onAttachedToWindow();
		Window window = getWindow();
		window.setFormat(PixelFormat.RGBA_8888);
	}

	public class BallPhysics extends View implements ITicker, SensorEventListener
	{
		private ArrayList<Ball> pool;
		private int maxBalls = 30;

		private Paint paint;
		private int colorId;
		private int[] colors;

		private double collisionDamping = .5;
		public double damping = .8;
		public double spin = 1;
		public double spinRadian = spin*Math.PI/180;

		private biga.Point gravity = new biga.Point( 0, 1 );

		public BallPhysics( Context context )
		{
			super(context);
			init(context);
		}

		private void init(Context context)
		{
			setFocusable(true);

			paint = new Paint();
			paint.setStyle(Paint.Style.FILL_AND_STROKE);
			paint.setAntiAlias(true);
			rgbColor(0xFFCC00);

			colorId = 0;
			colors = new int[] { 	0x003EBA, 0x5D7CBA, 0x8B9BBA, 0x29447B, 0x14223D, 0x455D8B, 0x7986A1,
									0xFF9000, 0xFFC77F, 0xFFE3BF, 0xA97838, 0x543C1C, 0xBF955F, 0xDDC5A6 };

			pool = new ArrayList<Ball>();

			Timer timer = new Timer(30, this);
			timer.start();

		}

		@Override
		public void tick()
		{

			update();
			invalidate();

		}

		@Override
		protected void onDraw( Canvas canvas )
		{

			int id = colorId;
			for( Ball b : pool )
			{

				rgbColor( colors[ id % colors.length ] );
				b.draw(canvas, paint);

				id++;
				rgbColor( colors[ id % colors.length ] );
				canvas.drawCircle( b.x, b.y, (float)( b.radius * Constants.oneByGoldenRatio ), paint);

			}
		}

		private void update()
		{

			double fx = 0, fy = 0, dax, day, dx, dy, dist, scale, maxdist, dmax, mag1;

			for( Ball a : pool )
			{

				if ( a.dragging ) continue;

				// friction
				a.vx *= damping;
				a.vy *= damping;

				// gravity
				a.vx += gravity.x;
				a.vy += gravity.y;

				//bounds check
				if( a.x < a.radius ) a.x = a.radius;
				if( a.y < a.radius ) a.y = a.radius;
				if( a.x > getWidth() - a.radius ) a.x = getWidth() - a.radius;
				if( a.y > getHeight() - a.radius )a.y = getHeight() - a.radius;


				dax = (a.x + a.vx);
				day = (a.y + a.vy);
				fx = fy = 0;

				for( Ball b : pool )
				{
					if ( a != b && coarseCollision(a,b))
					{
						dx = dax - b.x;
						dy = day - b.y;

						dist = Math.sqrt( dx*dx + dy*dy );
						maxdist = a.radius + b.radius;

						dmax = ( maxdist - dist);

						if (dmax > 0)
						{
							mag1 = dmax * collisionDamping / maxdist;
							fx += dx * mag1;
							fy += dy * mag1;
						}
					}
				}

				a.vx += fx;
				a.vy += fy;

				a.x += a.vx;
				a.y += a.vy;

			}

		}

		@Override
		public boolean onTouchEvent(MotionEvent event)
		{

			if( pool.size() > maxBalls  )
			{
				pool.remove(0);
				colorId++;
			}

			pool.add(new Ball(event.getX(), event.getY(), 25 + Math.random() * 60 ));

			return true;

		}

		public boolean coarseCollision( Ball a, Ball b )
		{
			return b.x-b.radius < a.x+a.radius && b.x+b.radius >= a.x-a.radius && b.y-b.radius < a.y+a.radius && b.y+b.radius >= a.y-a.radius;
		}

		private void rgbColor(int RGB)
		{
			paint.setARGB(0xFF, (RGB >> 16 & 0xFF), (RGB >> 8 & 0xFF), (RGB & 0xFF));
		}

		@Override
		public void onAccuracyChanged(Sensor arg0, int arg1){}

		@Override
		public void onSensorChanged(SensorEvent event )
		{

	          final float alpha = 0.5f;

	          gravity.x = alpha * gravity.x + (1 - alpha) * -event.values[0];
	          gravity.y = alpha * gravity.y + (1 - alpha) * event.values[1];

	          float max = .25f;
	          GeomUtils.clamp(gravity.x, -max, max );
	          GeomUtils.clamp(gravity.y, -max, max );

		}

		private class Ball extends Circle
		{
			public double vx = 0, vy = 0;

			public boolean dragging = false;

			public Ball( double x, double y, double radius )
			{
				super( x, y, radius );
			}
		}
	}
}
I’ve ported the delaunay triangulation algorithm from Flash to Android and created a small widget.
here are some outputs:
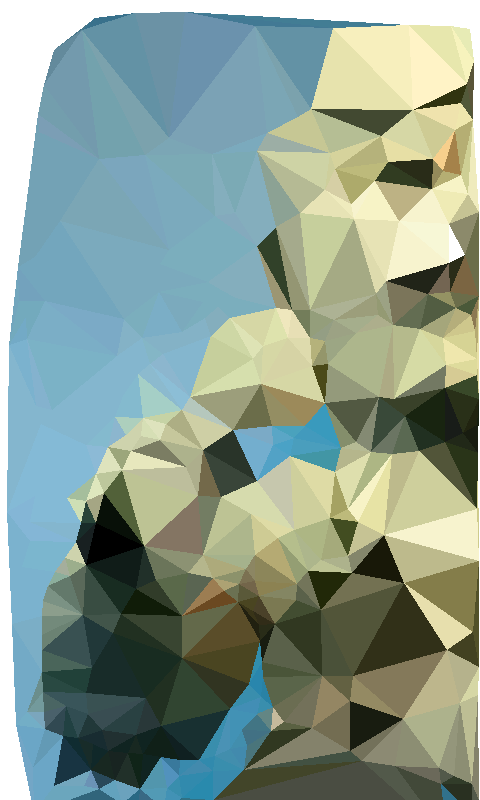
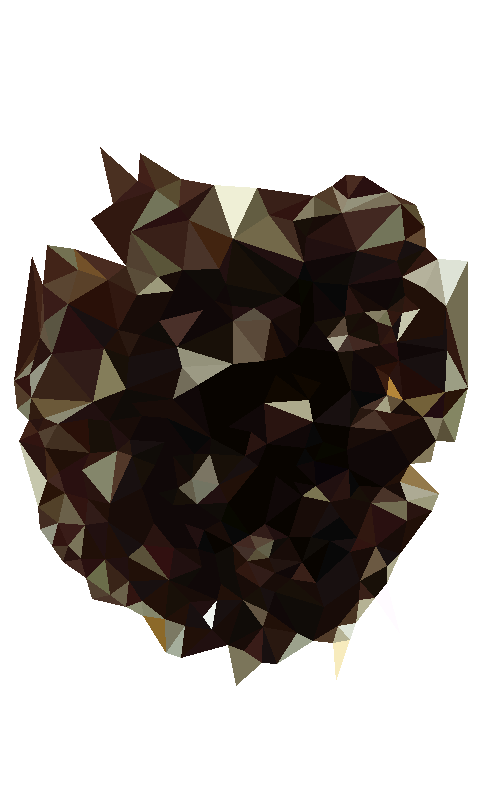
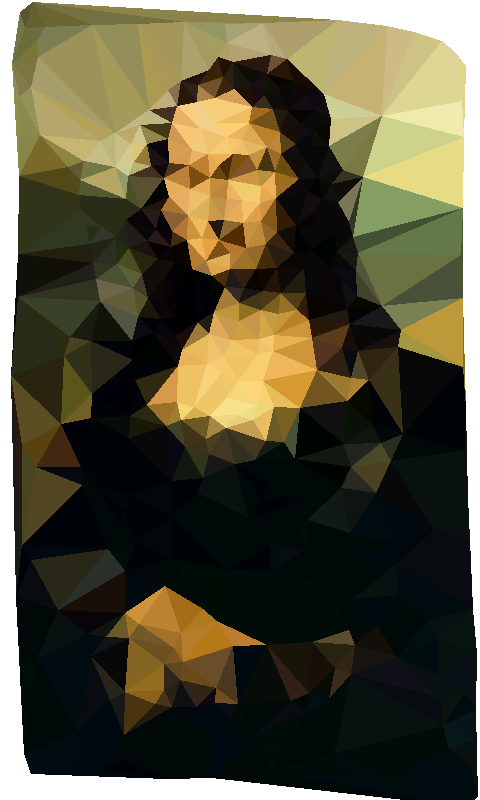
( poor Mona Lisa, humiliated once more… )
the delaunay lib is also included in the biga.jar.
here’s the code of the Activity:
package net.nicoptere.android.delaunay.sample;

import java.util.ArrayList;

import utils.AppHelper;
import utils.AppHelper.Orientation;
import android.app.Activity;
import android.content.Context;
import android.graphics.Bitmap;
import android.graphics.BitmapFactory;
import android.graphics.BitmapFactory.Options;
import android.graphics.Canvas;
import android.graphics.Paint;
import android.graphics.Path;
import android.graphics.Point;
import android.os.Bundle;
import android.view.MotionEvent;
import android.view.View;
import android.view.ViewGroup.LayoutParams;
import biga.delaunay.Delaunay;
import biga.delaunay.DelaunayPoint;
import biga.delaunay.DelaunayTriangle;

public class Delaunay_sampleActivity extends Activity
{
	static private int pictureId = 0;
	private DelaunayTest delaunay;
	@Override
	protected void onCreate(Bundle savedInstanceState)
	{

		super.onCreate(savedInstanceState);

		AppHelper.fullScreen(this);
		AppHelper.orientation(this, Orientation.PORTRAIT );

		delaunay = new DelaunayTest(this);
		addContentView(delaunay, AppHelper.WRAP );

	}

	public class DelaunayTest extends View
	{

		private Bitmap bmp;

		private Paint paint;

		private ArrayList<Point> points;

		public DelaunayTest( Context context )
		{

			super(context);

			//decode the image resource
			Options options = new Options();
			options.inSampleSize = 2;
			bmp = BitmapFactory.decodeResource(getResources(), R.drawable.picture, options );

			points = new ArrayList<Point>();

			paint = new Paint();
			paint.setStyle(Paint.Style.FILL_AND_STROKE);

		}

		@Override
		protected void onDraw(Canvas canvas)
		{

			// performs the delaunay computation
			ArrayList<DelaunayTriangle> tris = Delaunay.triangulate(points);

			// if there is something to draw
			if( tris != null )
			{

				Path path = new Path();

				for( DelaunayTriangle t : tris )
				{

					// gets the color at the center of the triangle
					DelaunayPoint p = t.getCenter();
					int c = bmp.getPixel((int) p.x % bmp.getWidth(), (int) p.y % bmp.getHeight());
					rgbColor(c);

					// creates a path to render the triangle
					path.reset();
					path.moveTo((float) t.p0.x, (float) t.p0.y);
					path.lineTo((float) t.p1.x, (float) t.p1.y);
					path.lineTo((float) t.p2.x, (float) t.p2.y);
					path.lineTo((float) t.p0.x, (float) t.p0.y);

					// draws to canvas
					canvas.drawPath(path, paint);

				}
			}
		}

		@Override
		public boolean onTouchEvent(MotionEvent event)
		{

			Point p = new Point((int) (event.getX()), (int) (event.getY()));
			if( p.x < 0 || p.y < 0 ) return true;

			// make sure the points are not too close
			boolean addme = true;

			for( Point pp : points )
			{
				if( Math.sqrt((pp.x - p.x) * (pp.x - p.x) + (pp.y - p.y) * (pp.y - p.y)) < 15 )
				{
					addme = false;
					break;
				}
			}

			// if the point is at least 15 pixels away from all others
			if( addme )
			{
				points.add(p);
				invalidate();
			}
			return true;
		}

		// assigns the next color to the canvas
		private void rgbColor(int RGB)
		{
			paint.setARGB(0xFF, (RGB >> 16 & 0xFF), (RGB >> 8 & 0xFF), (RGB & 0xFF));
		}

	}
}
I’ve also opened a developper account to publish the little marvels.
you can download them here:
any feedback on wether they work or not ( + eventually how perfs roll ) would be greatly appreciated :)
any feedback on the code, is also welcome ; I’ve only been tweaking for a month which is not much, there must be some better way to do what I did.
that’s it for now,
enjoy :)
 FlashDevelop
 HAXE
HAXE
my beloved readers wrote…