Ray marching is a technique used to render complex shapes and lightings, it’s been around for years but got some huge momentum in the past 5 years. I had some spare time and decided to give it a spin.
there are some really good online tools if you want to play around :
the latter being the most interesting to get started as it’s part of the stackgl project and has support for glslify (a modular set of shader utilities), this is what I used to understand better how things work.
this being said, I thought I’d use THREE.js rather than the above WebGL boilerplates because it allows users to easily add uniforms and post process passes. it is on a github repo
Ray Tracing (or rather Ray Casting) is a technique used to render high quality 3D images. a blunt description goes like:
for each “pixel” of the screen, a “ray” is sent from the camera through the 3d scene and returns the color for that pixel.
the oldest ray tracing engine I know of is POV-Ray which allows this type of glorious render:
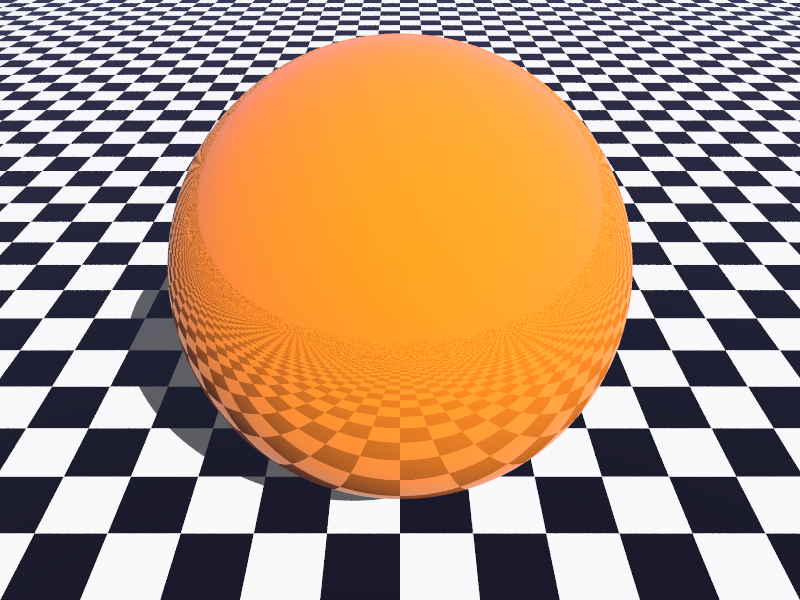
so simple as it seems, it displays some already complex behaviours such as shadow casting, reflections, light bouncing and not fog but rather the Fresnel effect of the reflections.
ray tracing is a well known and well documented technique. it’s also computationally expensive, suited for pre-rendered images rather than real-time rendering (even though more and more attempts are made to go towards real-time in games and architecture visualization).
Ray Marching is a variation of the ray tracing ; instead of evaluating if a “ray” hits the surface of a “model” of the “scene” in the direction of the ray and at a linear step size, the “scene” will return the shortest distance to the “model” in any direction and use this distance as the “step size” along the “ray”.
a visual explanation may be better:
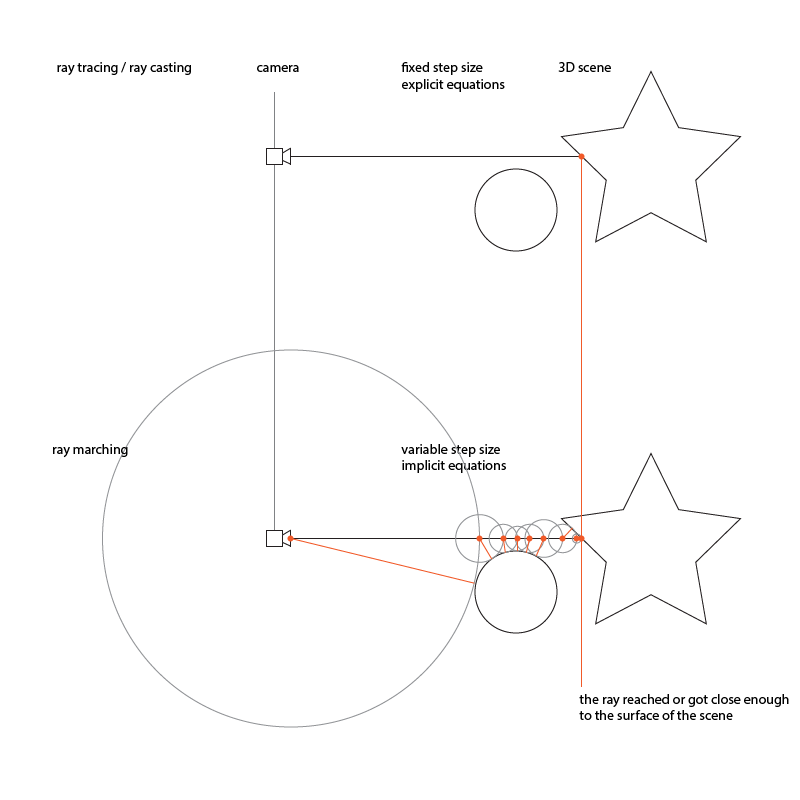
the “airquotes” around scene and model, are there to emphasize the fact that there is no geometry involved but rather a mathematical description of the geometry.
indeed, as the only goal of the signed distance function (or SDF the function that tells us if and at which distance the ray has reached the surface of something in the scene) is to return the shortest distance to the model being computed, the only information we need is therefore a distance ; a float. as we only need a distance, using a mathematical description of our scene is the way to go.
for instance, a sphere centered at (0,0,0) is described as:
|
1 2 3 4 |
float sphere( vec3 pos, float radius ) { return length( pos ) - radius; } |
where pos is the position along the ray & radius the radius of the sphere.
update: after a spontaneous and much appreciated proofread by Hector Arellano
the main difference between ray casting and ray marching, is the fact that ray casting uses explicit equations while ray marching uses implicit equations to render the scene.
in other words, when rendering a scene, a ray caster will find the exact intersection point between the ray being casted and the explicit equation of the geometry while
also a variable step size is good to for lower steps count but when the ray reaches the borders, it tend to get lost, for that case it’s better to use a fixed size and play with the threshold.
end of update
the downside of ray marching lies in the complexity of the SDF as it needs to be computed at each step, the downside of ray casting lies in the complexity of handling numerous intersection tests.
of course, there are ways to bail out early and spare computations, it’s very frequent in ray tracing to test the bounding volumes first and cast the ray only if there is something in the path.
in practice there are 4 steps to follow:
- get the screen position : the pixel we wan to evaluate
- get the ray direction
- loop through the SDF to get the pixel color
- shade the fragment
it’s important to note that the only required uniform is the resolution (a vec2), here’s a bare bones implementation:
|
1 2 3 4 5 6 7 8 9 10 11 12 13 14 15 16 17 18 19 20 21 22 23 24 25 26 27 28 29 30 31 32 33 34 35 36 37 38 39 40 41 42 43 44 45 46 47 48 49 50 51 |
uniform vec2 resolution; //the signed distance field function //used in the ray march loop float sdf(vec3 p) { //a sphere of radius 1. return length( p ) - 1.; } void main( void ) { //1 : retrieve the fragment's coordinates vec2 uv = ( gl_FragCoord.xy / resolution.xy ) * 2.0 - 1.0; //preserve aspect ratio uv.x *= resolution.x / resolution.y; //2 : camera position and ray direction vec3 pos = vec3( 0.,0.,-3.); vec3 dir = normalize( vec3( uv, 1. ) ); //3 : ray march loop //ip will store where the ray hits the surface vec3 ip; //variable step size float t = 0.0; for( int i = 0; i < 32; i++) { //update position along path ip = pos + dir * t; //gets the shortest distance to the scene float temp = sdf( ip ); //break the loop if the distance was too small //this means that we are close enough to the surface if( temp < 0.01 ) break; //increment the step along the ray path t += temp; } //4 : apply color to this fragment //we use the result position as the color gl_FragColor = vec4( ip, 1.0); } |
this should give this incredible result:
WOW !!!
this is a good start nonetheless :)
of course, spheres are boring and there are plenty of other primitives to play with, Íñgo Quílez‘ distance functions became the defacto reference, note that he did a handy scene on shadertoy that displays all the shapes at once (+lights, shadows, AO, reflections etc.). the methods below describe a sphere and a box with rounded corners (I’ve added a vec3 center to position the object in space).
|
1 2 3 4 5 6 7 8 9 |
float sphere( vec3 pos, vec3 center, float radius ) { return length( pos - center ) - radius; } float box( vec3 pos, vec3 center, vec3 size, float corner ) { return length( max( abs( pos-center )-size, 0.0 ) )-corner; } |
if you understood the idea behind ray marching, you remember that we’re only interested in retrieving a distance – a float – each time we move along the ray. things gets really interesting when you start combining different shapes ; two or more shapes will be more or less close to the point in space being evaluated and that’s where we can decide how to combine them. the generic name for this kind of operations is Constructive Solid Geometry (CSG) and consists in performing boolean operations on geometric primitives to build complex shapes.
these are the basic operations: union, subtraction and intersection.
|
1 2 3 |
float unite( float a, float b){return min(a, b);} float subtract( float a, float b ){ return max(-a, b); } float intersect( float a, float b ){ return max(a, b); } |
they can be used in the SDF function like so:
|
1 2 3 4 5 6 7 8 9 10 11 12 |
float sdf(vec3 p) { //we build a sphere float s = sphere( p, vec3( 0. ), 1.25 ); //we build a box float b = box( p, vec3( 0. ), vec3( 1. ), .0 ); //we return the combination of both: // subtracting the sphere from the box return subtract( s,b ); } |
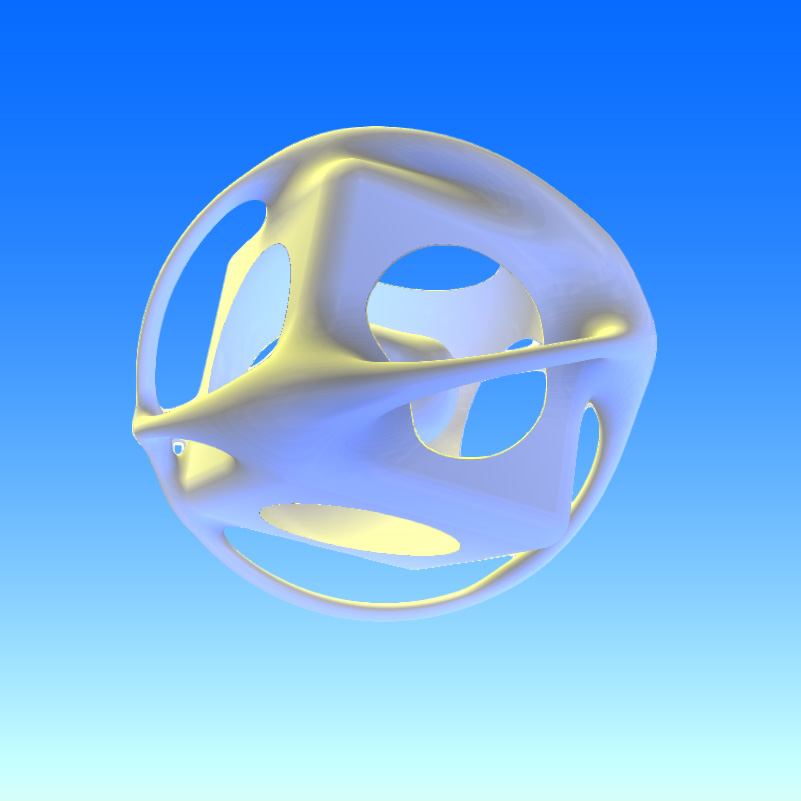
this now gives the result below:
there are other ways to blend objects together, the most useful is described here.
I’ll just leave you with some demos of where a week of work led me (all demos are also on the repo):
day 3 mouse interactions
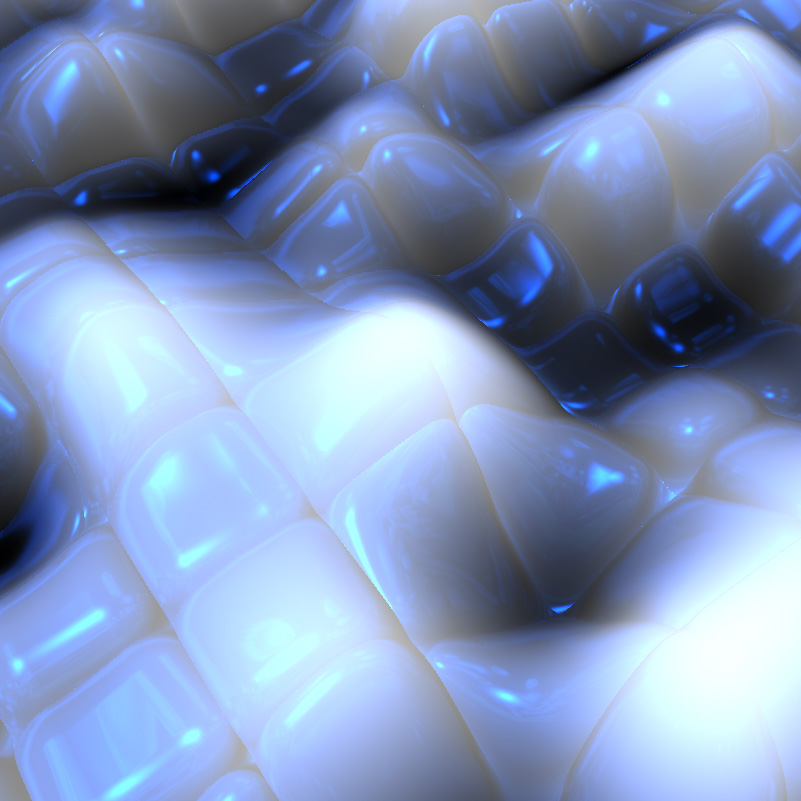
day 4 something moving (and a bit gross)
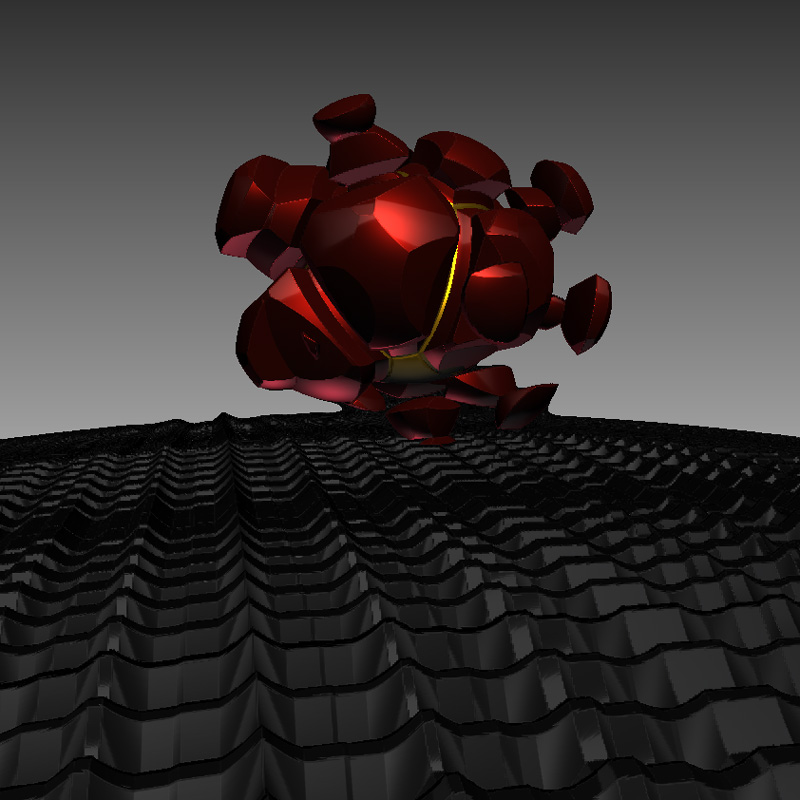
day 5 something moving
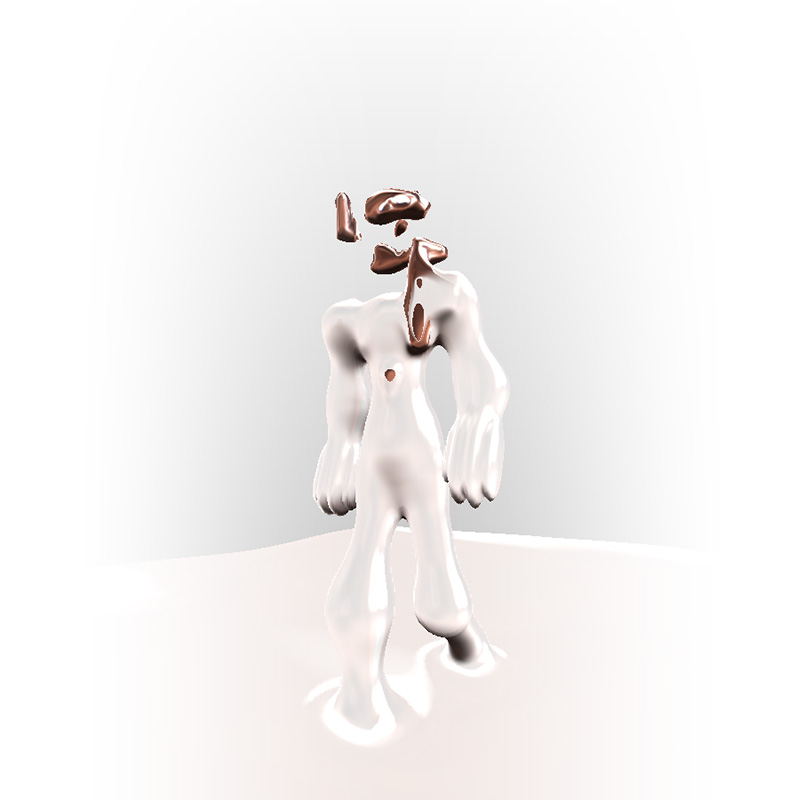
day 7 a walker
the platforms I mentioned at the beginning of the article are basically gold mines to find advanced techniques, with brillant people sharing brillant tricks.
but otherwise, that’s all there is to ray marching, now you can go BANANA and make some pretty pictures :)
cheers!
Pity we can’t write distance estimators that take ray direction into account, isn’t it.
great stuff!
Love the ‘walker’ – looks like an animated Francis Bacon figure
http://www.lilfordgallery.com/wp-content/uploads/2015/07/triptych-1983.jpeg
Thanks for sharing!
hi Andreas, long time no see :)
I checked your blog, seems you’re quite into astual art those days, that’s awesome!
keep up
Hey Nicholas, clicked the link then recognized the last name… Nice work, the walker especially. Like a Matthew Barney net art piece. Hope all is well with you!
hey! thanks for passing by, glad you like it :)
there is indeed some Matthew Barney in there too ^^
Thank you for this article.
I ‘m almost sure I didn’t understood it entirely but thank you anyway :)
The results on my screen are great but very slow (4Go RAM only and a small video card) because you works directly at the scale of the pixels and with a 24″ screen like the one I have, it means a huge amount of calculations…
Why don’t you perform the calculation in the vertex-shader and then share the color of each vertex (of each triangle) in a varying to the fragment-shader ?
I think that your mesh is already dense enough to get a very good result on the screen but it may works 50-100x faster (corresponding to the difference between the amount of triangles and the amount of pixels contained in every triangles) if you do the calculation in the vertex-shader.
(Maybe I missed something in your code that need to be done in the fragment shader ; sorry for my post if it’s the case)
@tlecoz interesting idea, maybe if you calculate depth in VS instead, and perform some a-priori sharp cuts in FS… that would probably make connection areas (such as where his feet sink into the ground) very tricky to render.
in any case it should be possible to use “rough” depth from VS to start the ray closer to actual geometry in FS and thus save some extra time, at the cost of bypassing some small objects.
I think the problem is that when evaluating distance functions, you’re not working with polygonal meshes. The picture is rendered on a screen quad (two triangles covering the entire screen and the final image is then rendered in the fragment shader by ray marching each pixel.
Might have some inaccuracies/wrong terms there but that’s the general idea.
First,
Your blog and this project are fantastic! I was really amazed with Shadertoy, but I had no idea about what was going on with Ray marching – that is until I stumbled upon your blog and repo – great job!
So, now I am wondering about how to modify the shaders to produce a stereoscopic version that could be used for mobile VR? – like in google cardboard.
I’ve been looking at Mozilla’s A-frame (it’s webVR using Three.js) and I’d like to try to create stereoscopic Ray Marching shaders that could be used with an a-frame scene.
Hello Cyrus !
Look at this : https://vr.chromeexperiments.com/
At the bottom of the page, you can download a basic example a demo working (very well) with cardboard
Awesome Creative Coding – WP.DesaKami.ID
[…] Ray marching (with THREE.js) – Article about ray marching with three.js by @nicoptere. […]