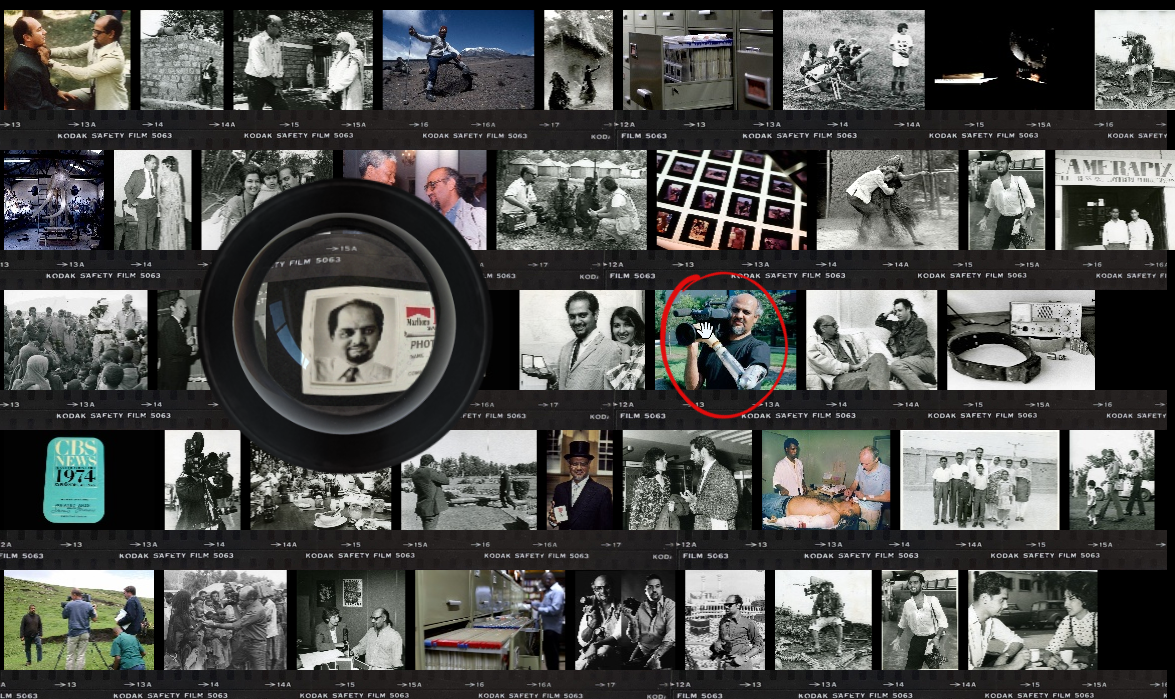
I worked on a quick project for Google Arts & Culture in partnership with the Mo Amin Foundation.
the foundation opened up their archive allowing everyone to access Mohamed (‘Mo’) Amin’s legacy.
to be honest, I had no clue who he was so I was pretty surprised to discover his life and work.
he documented Africa from the inside, without that western patronizing filter I’m so used to (and bothered by).
so I’d like to encourage you to visit the dedicated page on GA&C: g.co/MoAminArchive and learn more about the man and his work.
the experiment itself lives here : https://artsandculture.google.com/experiment/the-mo-amin-archive/wAEJDXhB5ZAhoA
the tech bit
the experiment boils down to displaying a wall of many images (as of today: 5893).
the project had already been started and was using PixiJS, a (mostly) 2D WebGL engine.
I never worked with PixiJS and once I understood that the canonical way to use it was:
|
1 2 3 |
import * as PIXI from "pixijs"; //then let g = new PIXI.Graphics() |
the work got much easier. Pixi is well documented and all the features I needed were there, out of the box.
now, to tackle such a high number of images, you should avoid using the scene graph as much as possible: it’s inefficient and each time someone uses the addChild() method, a kitten dies.
enter Instanced geometry, if you’re a real friend, you may have read a previous article about instanced geometries in three.js, it’s the same, minus three.js, plus Pixi.
as the name suggests, instanced geometry lets you use a geometry and instantiate it many times.
the biggest benefit is that no matter how many instances you create, they’ll be rendered in a single drawcall which is a good thing.
the Pixi doc has a simple example, the somewhat tricky part is building the buffer and the attributes:
|
1 2 3 |
const buffer = new PIXI.Buffer(new Float32Array(geometry.instanceCount * (positionSize + colorSize))); geometry.addAttribute('aIPos', buffer, positionSize, false, PIXI.TYPES.FLOAT, 4 * (positionSize + colorSize), 0, true); geometry.addAttribute('aICol', buffer, colorSize, false, PIXI.TYPES.FLOAT, 4 * (positionSize + colorSize), 4 * positionSize, true); |
more specifically, this method:
geometry.addAttribute(id, buffer, size, normalized, type, stride, start, instance)
can be a bit intimidating, here’s a commented intitialisation (learning purpose code, not sure it works if copy/pasted):
|
1 2 3 4 5 6 7 8 9 10 11 12 13 14 15 16 17 18 19 20 21 22 23 24 25 26 27 28 29 30 31 32 33 34 35 36 37 38 39 40 41 42 43 44 45 46 47 48 49 50 51 52 53 54 55 56 57 58 59 60 61 62 63 64 65 66 67 68 69 70 71 72 73 74 75 76 77 78 79 80 81 82 83 84 85 86 87 88 89 90 91 92 93 94 95 96 97 |
import * as PIXI from "pixi.js"; //we extend a PIXI Geometry Object let attributeLength, buffer; export default class GridGeometry extends PIXI.Geometry { constructor(total) { //create the geometry super(); // add the a quad mesh (the 'blueprint', the shape that will be instantiated) //create the vertices this.addAttribute("aVpos", [0, 0, 0, 1, 1, 1, 1, 0]); //create the uvs this.addAttribute("aVuv", [0, 0, 0, 1, 1, 1, 1, 0]); //create the indices this.addIndex([0, 1, 2, 0, 2, 3]); // a HA! make it an instanced geometry this.instanced = true; // and set the instance count this.instanceCount = total; //now the weird bit: //say we want to place each quad instance at a 2D position, //rescale it and make it to sample a source texture at a given uv //we'll need 6 attributes: X, Y, SX, SY, U and V //attribute length is "how many floats are necessary per instance" attributeLength = 6; //create the buffer //a buffer is a "blob of memory on the GPU" //you need to specify how much room it will take buffer = new PIXI.Buffer(new Float32Array(total * attributeLength)); //create attributes within the buffer //each attribute is a 2D vector (C is for 'Component'): it's 2 floats long const C = 2; //each attribute uses floats const T = PIXI.TYPES.FLOAT; //this is called the "stride": how long is an instance attributes list //in this case, 6 floats so each attribute will be // 1 float (4 bytes) * attributeLength apart const S = 4 * attributeLength; //the stride is used to iterate over the whole buffer //and jump to the next instance // offset states 'within the stride, where does each specific attribute start' // with 2D vectors (C=2), the first offset is 0 floats, // the second will be 2 floats, the third will be 4 floats let O = 0; /* now we have everythin we need to create our attributes the first argument is the name we want to give it this is how we can retrieve it within our shader this reads: every N stride, the first 2 values of this buffer will be called "aIpos" it's a vec2 (C=2), I don't want it to be normalised, it's made of floats (T) the next instance is 6 (S=6) floats away and the 2 values I want are located at O within this stride. oh and it's an instanced buffer! //*/ this.addAttribute("aIpos", buffer, C, false, T, S, O, true); //yay, now we'll do the same for the scale //everything but the name and the offest are the same so, //before we create the next attribute, we need to increment the offest O += 4 * C; //ok, now O = 2 floats //let's declare the scale this.addAttribute("aIscale", buffer, C, false, T, S, O, true); //and finally, the source uvs //increment the offset O += 4 * C; //create the attribute this.addAttribute("aIuv", buffer, C, false, T, S, O, true); // initialisation is done! //assign some values for (let i = 0; i < total; i++) { let iterator = i * attributeLength; //position buffer.data[iterator++] = (Math.random() - 0.5) * 100; buffer.data[iterator++] = (Math.random() - 0.5) * 100; //scale buffer.data[iterator++] = Math.random(); buffer.data[iterator++] = Math.random(); //source uvs buffer.data[iterator++] = (i%columns) / columns; buffer.data[iterator++] = ~~(i/columns) / columns; } //don't forget to update the new values! buffer.update(); } } |
hope it makes sense.
Atlas generation
now, before playing with our instances, we’ll need an atlas. an atlas is a texture that contains many smaller pictures, it’s memory efficient and PixiJS massively uses it under the hood.
a GPU is a state machine that needs to be set up before rendering any object. with many objects and many textures, this set up can slow down the execution a lot, if we use a single object and a single texture, it’s much faster (the instanced geometry above is processed as a single object).
there are tools to create such atlases, the most famous is Texture Packer, it has a lot of nice features ( tightly pack items, create metadatas, compress textures, etc. ), in my case this was only to create very coarse thumbnails to wait for the preload of larger thumbnails.
I usually have a Python workflow to pre-process the data and don’t need much artistic control so I use OpenCV.
the script lists the images of a folder, create a grid from a tile size and stick the images into a big square texture.
here’s the python atlas script calling it like :
|
1 |
python atlas.py -src source -dst atlas -n color -s 64 |

produces a color image with 64px RGB thumbnails next to each other
|
1 |
python atlas.py -src source -dst atlas -n packed -s 64 -p true |
setting the ‘pack’ flag to true converts the images to greyscale and packs them into the R,G,B channels
the Mo Amin collection contains a lot of black and white pictures and the packing trick drastically reduced the atlas size (16Mo > 2.2Mo)
the downside is that the JPG compression uses all 3 channels and each channel creates very visible artifacts on the other channels.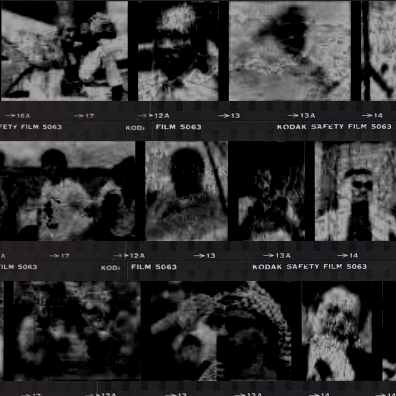
In this case, it was aligned with the art direction of the experiment, it looks like dust and scratches and the thumbnail is here to improve the quality.
but it may be something you want to avoid (saving the image as PNG solves the issue bug increases the file size…).
I wrote a very basic python script to determine whether a picture is color or greyscale, leaving it below for posterity:
|
1 2 3 4 5 6 7 8 9 10 11 12 13 |
import cv2 from skimage.metrics import structural_similarity as ssim def isColor( img ): gr = cv2.cvtColor(img, cv2.COLOR_BGR2GRAY) b,g,r = cv2.split(img) score = 0 v, _ = ssim( r, gr, full=True) score += v v, _ = ssim( g, gr, full=True) score += v v, _ = ssim( b, gr, full=True) score += v return score / 3 < 0.99 |
so now we have everything we need to display the wall of images!
you should add a “sampler” and a “channel” attribute to the instances so that they know which texture and which channel to sample.
in the fragment shader:
|
1 2 3 4 5 6 7 8 9 |
vec3 getColor( vec2 uv, int channel ){ //use the rgb channels if( channel == 0 )return texture2D(colorSampler, uv).rgb; // or sample a given channel vec4 tex = texture2D(greayscaleSampler, uv); if( channel == 1 )return vec3( tex.r ); if( channel == 2 )return vec3( tex.g ); if( channel == 3 )return vec3( tex.b ); } |
Lens effect
there was a (rather gimmicky) lens effect to implement, I was surprised how concise the code was with Pixi (three.js is a bit more verbose when it comes to postprocessing).
|
1 2 3 4 5 6 7 8 9 10 11 12 13 14 15 16 17 18 19 20 21 22 23 24 25 26 27 28 29 30 31 32 33 34 35 36 37 38 39 40 41 42 43 44 45 46 47 48 49 50 51 52 53 54 |
import * as PIXI from "pixi.js"; import vertexSrc from "./lens-vs.glsl"; import fragmentSrc from "./lens-fs.glsl"; let renderer, target, rt, uniforms; export default class Lens extends PIXI.Mesh { constructor(_renderer, _target) { renderer = _renderer; target = _target; //in doubt pass the stage :) rt = new PIXI.RenderTexture.create({ width: 256, height: 256 }); rt.scaleMode = PIXI.SCALE_MODES.NEAREST; renderer.render(target, rt); const geometry = new PIXI.Geometry(); geometry.addAttribute("position", [0, 0, 1, 0, 1, 1, 0, 1], 2); geometry.addAttribute("uv", [0, 0, 1, 0, 1, 1, 0, 1], 2); geometry.addIndex([0, 1, 2, 0, 2, 3]); uniforms = { time: 0, uTex: rt, radius: 150, density: window.devicePixelRatio, mouse: [0.5, 0.5], resolution: [1, 1], }; const shader = PIXI.Shader.from(vertexSrc, fragmentSrc, uniforms); super(geometry, shader); } update(mouse) { //render stage to texture this.visible = false; renderer.render(target, rt); uniforms.uTex = rt; this.visible = true; //update the uniforms uniforms.time = performance.now() * 0.0001; let w = window.innerWidth; let h = window.innerHeight; uniforms.mouse[0] = mouse.x / w; uniforms.mouse[1] = mouse.y / h; uniforms.resolution[0] = w; uniforms.resolution[1] = h; } resize(w, h) { // 'physical' lens size let r = Math.min(250, Math.max(w, h) / 4); uniforms.radius = r; //resize render target rt = new PIXI.RenderTexture.create({ width: w, height: h }); this.scale.set(w, h); } } |
then instantiation looks like this:
|
1 2 3 |
let l = new Lens(app.renderer, app.stage); l.resize(window.innerWidth, window.innerHeight); app.stage.addChild(l); |
the surprisingly hard part was to make it work with various pixel ratios, I may have missed something but my shader is uselessly convoluted and almost longer than the Lens class.
|
1 2 3 4 5 6 7 8 9 10 11 12 13 14 15 16 17 18 19 20 21 22 23 24 25 26 27 28 29 30 31 32 33 34 35 36 37 38 39 40 41 42 43 44 45 |
precision mediump float; uniform sampler2D uTex; uniform float time; uniform vec2 mouse; uniform vec2 resolution; uniform float density; uniform float radius; varying vec2 vUv; float lerp(float t, float a, float b) { return a * (1. - t) + b * t; } float norm(float t, float a, float b) { return (t - a) / (b - a); } float remap(float t, float a0, float b0, float a1, float b1) { return lerp(norm(t, a0, b0), a1, b1); } void main() { //distance to mouse vec2 m = mouse; vec2 o = ( vUv - m ); vec2 dir = o; //squarify uvs float ratio = resolution.x / resolution.y; if( resolution.y > resolution.x ){ ratio = resolution.y / resolution.x; o.y *= ratio; }else{ o.x *= ratio; } // set circle scale o /= ratio * density * .5; //bulge float t = remap( radius, 0., max( resolution.x, resolution.y ), 0., 1./density ); float l = length(o); //within the radius ? if( l < t ){ float d = smoothstep( 0., 1.5, 1. - l ); gl_FragColor = texture2D(uTex, vUv - dir * d); }else{ discard; } } |
by no means a canonical way of doing stuff but it works on most devices.
and that’s about it, for this nice little project.