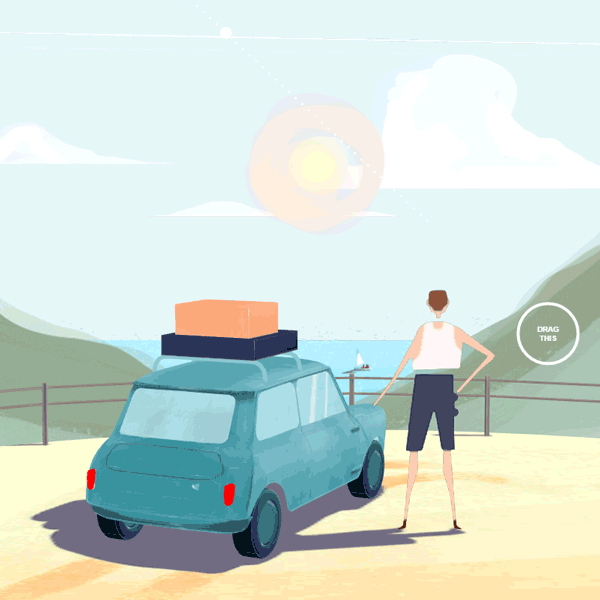
last december, the nice people at Cher Ami (“dear friend” in french) contacted me to give them a hand on a little animation / wish card they wanted to release in january, I gladly accepted which gave birth to this refreshing little thing http://www.ashortjourney.com/
Cher Ami has qualified people in house, a creative director, a copywriter/musician, a front end developer (Etienne Chaumont), a motion designer (Yannice Berthault ) and for this project, they worked with super talented 3D artist Benoît Challand who did all the 3D.
I mostly did the WebGL (with THREE.js), took some shortcuts and had to find a couple of interesting solutions that I would like to share here.
the site is divided into 9 scenes, the first thing I did was to export all the 3D scenes as series of binary 3D objects. as we were on a relatively tight deadline, my project was to merge all the objects of each scene into one big ass binary and so long for the bandwith but I noticed that 2 scenes could be reused as they were a X axis flipped version of the same models with different textures. after taking a closer look, I realized that many objects found in the second scene (the bag closeup) were reused all the way, the car was reused four times, the bag 3, the camera 2 etc. so I chose to use a reusable mesh system instead. I was quite happy with my Model class ; it allowed multiple assets loading and async instanciation that proved quite handy. this is the code:
|
1 2 3 4 5 6 7 8 9 10 11 12 13 14 15 16 17 18 19 20 21 22 23 24 25 26 27 28 29 30 31 32 33 34 35 36 37 38 39 40 41 42 43 44 45 46 47 48 49 50 51 52 53 54 55 56 57 58 59 60 61 62 63 64 65 66 67 68 69 70 71 72 73 74 75 76 77 78 79 80 81 82 83 84 85 86 87 88 89 90 91 92 93 94 95 96 97 98 99 100 101 102 103 104 105 |
var models = function( exports ){ var bl = new THREE.BinaryLoader(); exports.load = function( scope, assets, cb ){ if( assets == null || assets.length == 0 ){ if( cb )cb(); return; } bl.load( assets[0].model, function(g){ g.name = assets[0].model; scope.geometries.push( g ); textures.loadTexture( assets[0].texture, function( t ){ var material = materials.bitmap.clone(); material.uniforms.texture.value = t; scope.materials.push( material ); assets.shift(); if( assets.length > 0 ){ exports.load( scope, assets, cb ); }else{ if( cb )cb(); } }); }); }; exports.generic = function(){ var f = function( fc, Class, assets, parent, cb ){ THREE.Object3D.call( fc ); Class.loaded = Class.loaded || false; Class.loading = Class.loading || false; Class.geometries = Class.geometries || []; Class.materials = Class.materials || []; Class.instances = Class.instances || []; if( !Class.loaded && !Class.loading ){ Class.loading = true; var scope = fc; exports.load( Class, assets, function(){ Class.loaded = true; Class.loading = false; populate( scope, Class ); parent.add(scope); scope.init(); if( cb )cb( scope ); scope.onLoadComplete(); //instantiate all pending models Class.instances.forEach(function(c){ populate(c, Class); c.parent.add( c ); c.init(); if( c.cb ) c.cb( c ); c.onLoadComplete(); }); } ); return; } else if( Class.loading ){ console.warn( 'this model is being loaded, can\'t instantiate now' ); fc.parent = parent; fc.cb = cb; Class.instances.push( fc ); return; } else { populate( this, Class ); parent.add( fc ); fc.init(); if( cb )cb( fc ); } }; //this is when all the subMeshes are added to this Object3D function populate( scope, Class ){ for( var i = 0; i < Class.geometries.length; i++ ){ var mat = Class.materials[ i ].clone(); mat.uniforms.texture.value = Class.materials[ i ].uniforms.texture.value; var mesh = new THREE.Mesh( Class.geometries[i], mat ); mesh.name = Class.geometries[i].name; scope.add( mesh ); } } var _p = f.prototype = Object.create( THREE.Object3D.prototype ); _p.constructor = f; _p.init = function(){}; _p.onLoadComplete = function(){}; return f; }(); exports.dummy = new THREE.Object3D(); exports.dummy.origin = new THREE.Vector3(); return exports; }( {} ); |
a given model then inherits from this (yeah I know … inheritance vs composition blahblah… ^^ )
|
1 2 3 4 5 6 7 8 9 10 11 12 13 14 15 16 17 18 19 20 21 22 23 |
var Car = function(){ var assets = [ { model: 'src/3d/models/car_body.js', texture: 'src/3d/textures/car_body.jpg' }, { model: 'src/3d/models/car_wheels_back.js', texture: 'src/3d/textures/wheels.jpg' }, [...] ]; function Model( parent, cb ){ models.generic.call( this, this, Model, assets, parent, cb ); } var _p = Model.prototype = Object.create( models.generic.prototype ); _p.constructor = Model; [...] specific methods for this mesh _p.init = function(){ Object.defineProperties( this,{ body: { get:function () { return this.children[0] || models.dummy; }}, wheels: {get: function() { return this.children[2] || models.dummy; } } }); this.body.material.uniforms.scaleUv.value.x = 0.5; }; return Model; }(); |
then if you call a new Car( scene1 ) and new Car( scene2 ), both will appear in their respective scenes when the first has finished loading. of course if a Model is already loaded, it is instantiated directly using the same assets.
the textures class is basically static Dictionary that can load textures and materials exposes the raw materials that each object will copy.
I used 3 custom materials: a regular “bitmap”, a “blend” and a “transition” material.
the bitmap material displays a texture, as we have objects that can have 2 versions of their textures, I added a deltaUv and scaleUv uniforms that let me shift and squash the uvs. for example the following texture is used on the bag in the last bedroom.

it can be used with scaleUv = .5 a deltaUv.y = 0 to display the top half and deltaUv.y = .5 to display the bottom half, using a deltaUv.x of .5 will switch to the “night”(right side) version of both textures.
the material has brightness saturation contrast + alpha uniforms, brightness is used to animate the popups on the desktop for instance.

at some point I added a “binoculars” effect hence some extra uniforms and a slightly heavier shader. that’s the vertex shader (nothing fancy…) it’s the same for all 3 materials.
|
1 2 3 4 5 6 7 8 |
uniform vec2 deltaUv; uniform vec2 scaleUv; varying vec2 vUv; void main() { vUv = ( uv * scaleUv ) + deltaUv; gl_Position = projectionMatrix * modelViewMatrix * vec4( position, 1. ); } |
and the fragment
|
1 2 3 4 5 6 7 8 9 10 11 12 13 14 15 16 17 18 19 20 21 22 23 24 25 26 27 28 29 30 31 32 33 34 35 36 37 38 39 40 41 42 43 44 45 46 47 48 |
uniform sampler2D texture; uniform float brightness; uniform float saturation; uniform float contrast; uniform float alpha; uniform vec2 resolution; uniform float radius; uniform vec3 color; vec3 bsc( vec3 color, float brt, float sat, float con) { vec3 brtColor = color * brt; float intensity = dot( brtColor, vec3(0.2125,0.7154,0.0721) ); vec3 satColor = mix( vec3( intensity ), brtColor, sat ); return mix( vec3( .5 ), satColor, con); } varying vec2 vUv; void main(){ //samples the texture vec4 tex = texture2D( texture, vUv ); //applies brightness/saturation/contrast vec3 rgb = bsc( tex.rgb, brightness, saturation, contrast ); //the 'binoculars' //get a normalized screen position in the range [-1,1] vec2 p = 2. * ( gl_FragCoord.xy / resolution ) - 1.; //with the same aspect ratio as the screen p.x *= resolution.x / resolution.y; //left eye / right eye vec2 le = vec2( -.4, 0. ); vec2 re = vec2( .4, 0. ); //we'll compute a distance to the eyes' locations and a radius //beyond which we'll use a flat color d is the union of the 2 eyes float d = max( ( 1.-( distance( p, le ) * radius ) ) , ( 1.-( distance( p, re ) * radius ) ) ); //if d < .5 -> transparent //if d > .5 -> opaque color // .55 - .5 = 0.05 : that's the opaque to transparent gradient's length rgb = mix( color, rgb, smoothstep( 0.5, 0.55, d ) ); gl_FragColor = vec4( rgb, smoothstep( 0.5, 1., tex.a ) * alpha ); } |
here’s a live example of the binoculars effect (press play to start):
the blend material is used to render animated materials, it basically reads a spritesheet and blends 2 “frames” hence its name. at some point we had to choose between morphing two meshes or using this little trick. I did a quick proof of concept which was convincing enough. it is used to animate the shadow of the laptop in the first scene, the bag closing in the second scene and on the beach, it is used for the parasol and the bag.
this shader needs a single texture with X frames, a frameCount and a transition value, this is the fragment shader:
|
1 2 3 4 5 6 7 8 9 10 11 12 13 14 15 16 17 18 19 20 21 22 23 24 25 26 |
uniform sampler2D texture; uniform float frameCount; uniform float transition; varying vec2 vUv; void main(){ //this is a normalized transition value [0, 1] float t = transition; //these are the bounds of our animaition float lastFrame = frameCount-1.; float id = min( lastFrame, floor( frameCount * t ) ); float nextFrame = id + 1.; //this computes the 'local time' between frame X and frame X + 1 float delta = 1. / frameCount; float nt = ( t - ( id * delta ) ) / delta; //then we find the pair of uvs to sample vec2 uv0 = vUv + vec2( id * delta, 0. ); vec2 uv1 = vUv + vec2( min( lastFrame * delta, nextFrame * delta ), 0. ); //finally we blend the 2 textures with the local time gl_FragColor = mix( texture2D( texture, uv0 ), texture2D( texture, uv1 ), nt ); } |
even if it’s a bit counter intuitive, it remains simple enough. beware to create uvs frrameCount times smaller for your geometry. here’s a live demo (works best with an actual spritesheet)
finally the transition shader is used to go from scene to scene, it uses two rendertargets in which the source and destinations scenes are rendered then it performs an opening based on a normalized ratio [0,1]
the shader is slightly more hairy this time as it involves some geometry:
|
1 2 3 4 5 6 7 8 9 10 11 12 13 14 15 16 17 18 19 20 21 22 23 24 25 26 27 28 29 30 31 32 33 34 35 36 37 38 39 40 41 42 43 44 45 46 47 48 |
vec2 project( vec2 p, vec2 a, vec2 b ){ float A = p.x - a.x; float B = p.y - a.y; float C = b.x - a.x; float D = b.y - a.y; float dot = A * C + B * D; float len = C * C + D * D; float t = dot / len; return vec2( a.x + t * C, a.y + t * D ); } vec2 norm( vec2 p0, vec2 p1 ){ return normalize( vec2( -( p1.y - p0.y ), ( p1.x - p0.x ) ) ) * .5; } void main() { //screen space uvs vec2 uv = gl_FragCoord.xy / resolution; vec2 n = norm(p0,p1); vec2 c = p0 + (p1 - p0 ) * .5; vec2 a = c - n; vec2 b = c + n; //project the screen coord onto the p0/p1 axis vec2 pp = project( uv, b, a ) - c; //gets a signed distance float d = pp.x - uv.x + pp.y - uv.y ; float s = sign( d ); //use it to index the "opening" pp *= ( s * exp( d * transition ) ); //len is our "physical" transition ratio ; our gradient value float len = ( length( pp ) / length( c ) ); float t = smoothstep( len - alphaThreshold, len + alphaThreshold, transition ); //the source texture alpha must disappear vec4 tex0 = texture2D( texture0, uv ); //this alters the opacity of the source and create a gradient blend tex0.a = step( t, len ) + step( len, t ); //nothing special about the destination texture vec4 tex1 = texture2D( texture1, uv ); //just a linear interpolation vec4 tex = mix( tex0, tex1, t ); gl_FragColor = vec4( tex.rgb, tex.a ); } |
p0 and p1 are the 2 handles used when you drag the slider on the screen.
here’s not exactly the same but the demo I used as a starting point for this shader, click drag around, press play to view the transition itself.
that’s all there is to materials in the whole website :)
now there was a problem: the character.
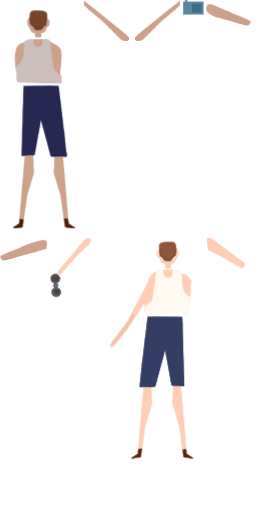
it was the second thing I tackled right after the meshes ; I thought we could use some sort of 2d animation system à la After Effects.
the source animation was done in AE exported as a 23000+ * 500 pixels spritesheet which triggered a loud “no way!”. indeed, there had to be a lighter way to recompose such simple motions. I don’t have After Effects and would have had too little time to study the scripting language. but I still have an old version of Flash so I did a quick prototype ; I moved different parts of the body, exported the clips transform matrices at each frame along with a spritesheet of the body parts. this gave me 3 lists:
|
1 2 3 4 5 6 7 8 9 10 11 12 13 14 15 16 17 18 19 |
//the clips uv coords on the texture var uvs = { jum_avb: {x:49,y:237,w:50,h:61}, jum_epa: {x:206,y:237,w:40,h:32}, jum_body: {x:99,y:237,w:107,h:230}, size: {w:256,h:512} }; //the clips dimensions var sizes = { jum_epa : [ 40,32 ], jum_avb : [ 50,61 ], jum_body : [ 107,230 ] }; //the clips transform matrices in time (a,b,c,d,tx,ty,[...] ) var frames = { jum_epa : [ 0.9999847412109375,-0.0010528564453125,0.0010528564453125,0.9999847412109375,322.7,168.35, [...]], jum_avb : [ 0.999542236328125,0.0269622802734375,-0.0269622802734375,0.999542236328125,320.1,191.8, [...]], jum_body : [ 1,0,0,1,241.8,132.4] }; |
and the final spritesheet
then on the JS side, I rebuild the clips and during the update, I recompose the transforms according to a normalized time and a frame count (much like the blend material).
this sounds complex but is in fact pretty easy (and performant):
|
1 2 3 4 5 6 7 8 9 10 11 |
for( var i = 0; i< this.limbs.length; i++ ) { //finds the frame var l = this.limbs[i]; var id = parseInt( parseInt( time * ( l.frames.length - 1 ) ) / 6 ) * 6; //applies the translation rotation to the 3D mesh l.position.x = l.frames[id+4] - sceneWidth / 2; l.position.y = sceneHeight/2 - l.frames[id+5]; l.rotation.z = Math.atan2(l.frames[id+2], l.frames[id+3] ); } |
apart from the transform matrices, we need the scene dimensions (512*512 in this case) to offset the clips around the center of the 3D object’s center, that’s not mandatory but was more convenient.
now this was all well and good BUT it didn’t work…
rendering this object with a perspective camera will cause 2 issues:
- it will apply a perspective transform that will “disconnect” the limbs
- transparencies will screw up
1 indeed Flash or whatever animation software usually works with an orthographic projection system, this allows to animate various elements without bothering with their 3D depth ; their position in the display list (or layer) gives them their render order and the occlusion can be computed quite easily.
2 was more problematic, there are several ways to deal with transparency in THREE none of which would work in my particular case : to render the element in the proper order (1 binoculars > 2 shoulder > 3 body ) I had to add a consequent depth between each mesh which made the perspective projection very visible and disconnected the limbs.
if I reduced the space between them, I ended up with transparency collisions ; a mesh supposed to be behind another would punch it’s alpha transparency through the one before it, even if I used the renderer’s logarithmicDepthBuffer and / or the sortObjects flag and / or the objects’ renderOrder property, there was no way to properly reproduce the animation.
the solution was – of course – to render this 3D objects into a renderTarget with an orthographic camera and use it as a texture for a quad mesh the size of the scene (512*512). no more depth problems and no more alpha transparency problem.
actually there is one transparency problem left : the animation is rendered on a black background causing a dark outline, I didn’t spend enough time on this issue but rather dodged it by thresholding the alpha in the material shader
|
1 |
smoothstep( 0.5, 1., tex.a ) * alpha |
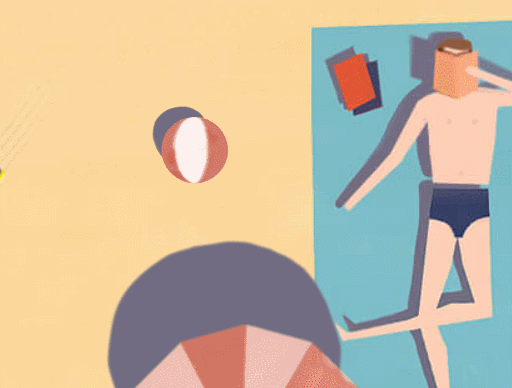
there are subtle interactions: in the first scene you can play with the ‘pen pot’ and with the ball or the bag on the beach. this is a simple raycasting test that triggers Tweens with a Bounce easeOut and random rotations… no physics or black magic here, yet it adds a playful touch (I literally spent 30 minutes playing with the pens on the desktop ^^).

the rest of the website was taken care of by Etienne and Yannice – imho – the soundtrack and sound FX are pretty awesome and serve the whole experience.
to sum it up, I really enjoyed working on this project, it is far from perfect, lots of things could be optimized further but all in all this short journey has a unique look & feel.
hope you’ll enjoy it much as I do :)
You are a clever bunny Nicolas!
haha that’s the nicest compliment ever, thanks! ^^
oh wow, graphics is awesome!
thanks,
and yes, that’s what working with a good 3D artist feels like :)